


According to Akamai’s report on the online retail performance, just a one-second delay in mobile load times can cut the conversion rates by up to 20%. With the attention span of humans becoming shorter by the year, our web and mobile apps must be fast and reliable. I'm sure we've all experienced that impatience/uneasiness while trying to load a page and it's taking more than 2 seconds to load. The spinner, just there, spinning, round and round. Most people abandon the page they're trying to view if it's unimportant or maybe restart their router because we are so used to getting immediate responses from our digital devices. This applies to most of the apps we use, imagine trying to open your Twitter app and everything is blank, 2seconds, 5seconds, 10seconds and nothing is on your homepage yet, it could be very frustrating. This is why we need to have optimized and performant mobile applications, so we don't lose the attention and focus of our users and improve their conversion rates.
Common sources of performance problems
According to the react-native docs, the following are common sources of performance issues in your react native app:
- Running in development mode.
- Using
console.logstatements. - Using ListView instead of Flatlist/SectionList where necessary.
- Animating the size of an image.
- Moving a view on the screen (scrolling, translating, rotating).
- Slow navigator transitions.
- Javascript thread doing a lot of work.
Please visit the docs for a more detailed explanation of why these problems cause your application to have performance issues.
I'm going to focus on tips to optimize your react code to reduce the amount of work being done on the javascript thread.
React Tips
- Measure performance.
- Avoid anonymous functions.
- Beware
shouldComponentUpdate. - Updating state based on props.
- Update state only when necessary.
While Using Redux
- Rewriting the way we use
connectwhile connecting a component to the redux store. - Avoid using the redux state for minor changes.
- Batch multiple redux actions.
React-Native Tips
- Use the reanimated Library or enable
nativeDriverwhile using Animated API. - Use Random Access Modules(RAM) bundler.
- Using inline
requires.
Measure Performance
The first thing you should do while trying to optimize your react-native app is to measure the performance of the app. You can check your app's performance with the Show perf Monitor option in the In-App developer menu. You can access the developer menu by shaking your device or by selecting "Shake Gesture" inside the Hardware menu in the iOS Simulator. You can also use the ⌘D keyboard shortcut when your app is running in the iOS Simulator, or ⌘M when running in an Android emulator on Mac OS, and Ctrl+M on Windows and Linux. Alternatively for Android, you can run the command adb shell input keyevent 82 to open the dev menu (82 being the Menu key code).
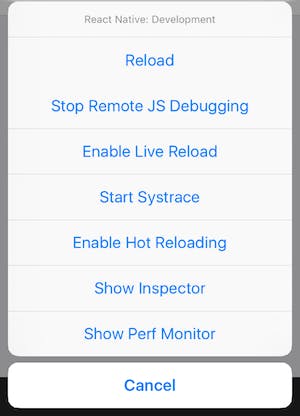
Clicking on the last option would bring up the monitor which looks like this:

The figures under "UI" and "JS" signify the frame per second(fps) of the main and javascript threads respectively. iOS devices display 60 frames per second, which gives you and the UI system about 16.67ms to do all of the work needed to generate the static image (frame) that the user will see on the screen for that interval. If you are unable to do the work necessary to generate that frame within the allotted 16.67ms, then you will "drop a frame" and the UI will appear unresponsive.
60fps should be the ideal rate of your app and when it drops below that as shown above in the "JS" thread, you know that it's your javascript code causing the performance issues.
NB: You can use React-native debugger and chrome dev tools to help you better understand the states and lifecycles of your app
For how React and react-native works:
NB: If you want to know how React and react natives works: Please check out this blog post
Avoid Anonymous Functions
const Child = ({ onClick })=> <button onClick={onClick}>Click Me</button>;

export const Parent = ()=> <Child onClick={()=> {}} />
The Parent component above has an onClick function which it passes to the Child component. If the function to be passed is a simple one-line function, it might be easier for you to write it inline, but the problem is anytime Parent re-renders we need to create a new reference for that onClick function and as react uses a shallow equal to compare the Virtual DOM trees before and after the update, this reference would keep changing over and over, so the Child component would re-render every single time. If this is something that is done in a component that is high up in the Virtual DOM tree then it means that all the child components of that particular branch would have to re-render.
It's much better to define it outside of the component or as a class method.
const Child = ({ onClick })=> <button onClick={onClick}>Click Me</button>;

const onClick = ()=> {};
export const Parent = ()=> <Child onClick={onClick} />
Beware shouldComponentUpdate
By default, a component can re-render if its parent is re-rendering or the props are different. This means that your component’s render method can sometimes run, even if their props didn’t change. This is an acceptable tradeoff in most scenarios, as comparing the two objects (previous and current props) would take longer. And this is what we should rely on in the majority of use-cases. shouldComponentUpdate is used to let React know if a component's output is affected by the current change in state or props and this usually prevents multiple rerenders especially if the parent component is being re-rendered and the child component doesn't need to change.
But we should be careful when using it, I'd give an example if we have a component that has two prop values and we only want to update it when the firstValue changes, we can use shouldComponentUpdate to prevent that component from re-rendering.
shouldComponentUpdate(nextProps){
  return nextprops.firstValue !== this.props.firstValue;
}
render(){
  const { firstValue, secondValue } = this.props;
  return (
    <Text>
      {firstValue} {secondValue} {thirdValue}
    </Text>
  );
}
If for some reason this component gets updated by another developer and there is a third value gets added.
shouldComponentUpdate(nextProps){
  return nextprops.firstValue !== this.props.firstValue;
}
render(){
  const { firstValue, secondValue, thirdValue } = this.props;
  return (
    <Text>
      {firstValue} {secondValue} {thirdValue}
    </Text>
  );
}
Now instead of having an updated component that updates whenever the first and third value changes we have a component that only updates when the first value changes. An easy solution to this would be to just update the shouldComponentUpdate method, but what if there are components like these and multiple values?
The solution to this is to allow React to do its thing most of the time, only use shouldComponentUpdate where necessary.
Updating State Based On Props
It is bad practice to update the local state of your component based on changes in the props being passed into it. You can set the state at a higher level and pass it down to the component as the state changes, but sometimes we can't avoid it entirely and we have to update our local state based on the props. Most people do this:
componentDidUpdate(prevProps, prevState){
  if(this.props.selected){
    this.setState({ updated: true }):
  }
}
But this isn't the right way to do it because your component would render twice, once when the props gets updated, and the second when you update your state. It is better to use the getDerivedStateFromProps. It is a component lifecycle method that is invoked right before calling the render method, both on the initial mount and subsequent updates. This means that you can update your state here before the component renders the first time around, thereby avoiding the second render. This method exists for special use cases like these, where the state depends on changes in props over time.
static getDerivedStateFromProps(props, state) {
  if(props.selected){
    return { updated: true };
  }
}
Update State Only When Necessary
onClick = ()=>{
  this.setState({ updated: true });
};
If we have a function like the one above that does one thing (sets the state to true, for example) on the click of a button, instead of having the component re-render after we set the state with every click, we can avoid that by checking the state to see if it has the value that we want to update it to.
onClick = ()=>{
  if(!this.state.updated){
    this.setState({ updated: true });
  }
};
Rewriting the way we use connect while connecting a component to the redux store.
const mapStateToProps = state = ({ id: getProductId(state) } );

const mapDispatchToProps = dispatch => {
  return { trackView: id=> ()=>dispatch(track('product-screen', id)) };
};

const mergeProps = (stateProps, dispatchProps) => {
  return { track: dispatchProps.trackView(stateProps.id) };
};

export default connect(
  mapStateToProps,
  mapDisptachToProps,
  mergeProps
)(Component);
mergeProps always creates a new reference when being used with connect, which means that any component that has mergeProps in it gets re-rendered when there is a change in the redux state. The same goes for mapDisptachToProps.
The connect function re-renders every time the redux state gets updated, which means that in an application where you have hundreds of reducers, sagas, the state would be updated consistently, and in turn, all of the functions that are connected to the redux store and have these functions(mapStateToProps, mapDispatchToProps, and mergeProps) would update all the time.
const mapStateToProps = state = ({ id: getProductId(state) } );

const mapDispatchToProps =  { trackView: track };

export default connect(
  mapStateToProps,
  mapDisptachToProps,
)(Component);
The solution is to avoid using mergeProps unless it is necessary. For mapDispatchToProps, it is best to use them as objects so that way, the references stay the same while react is doing its shallow equal comparison.
Avoid Using The Redux State For Minor Changes
Redux is a tool that should be used to manage the global state of your app, especially if the app has become very complex. Although we might be tempted to use this central state management for something like this,
handleToggle = (isHidden) => {
  this.props.dispatch({ payload: !isHidden, type: 'SHOW_PASSWORD' });
};
It would be more efficient to manage this state locally, in the component that needs it, because this minor state update would update the Redux store and thus, cause a re-rendering of all the components connected to the store.
handleToggle = (isHidden) => {
  this.setState({ showPassword: !this.state.showPassword });
};
Batch Multiple Redux Actions
Instead of updating the redux store every time we want to do something that has multiple parts, for example, starting up our app(which can sometimes have multiple steps)
onClick = ()=>{
  this.props.dispatch({ type: 'GET_INIT_CONFIG' });
  this.props.dispatch({ type: 'GET_UPDATE' });
  this.props.dispatch({ type: 'SAVE_CONFIG' });
}
We can batch all of the actions as one action that updates the redux store and have all the different reducers for the different parts listen to this action.
onClick = ()=>{
  this.props.dispatch({ type: 'UPDATE' });
}
Use The Reanimated Library Or Enable nativeDriver While Using Animated API.
Animations are very important to create a great user experience. React Native provides two complementary animation systems: Animated for granular and interactive control of specific values, and LayoutAnimation for animated global layout transactions.
The Animated API is designed to be serializable (converting objects to string and sending it across the bridge). By using the native driver, we send everything about the animation to the native side before starting the animation, allowing native code to perform the animation on the UI thread without having to go through the bridge on every frame and thus improving the performance of the javascript side.
Animated.timing(this.state.animatedValue, {
  toValue: 1,
  duration: 500,
  useNativeDriver: true // <-- Add this
}).start();
React-Native Reanimated provides a more comprehensive, low-level abstraction for the Animated library API to be built on top of and hence allow for much greater flexibility especially when it comes to gesture-based interactions.
Use Random Access Modules(RAM) bundler
The RAM bundle format is a new way of packaging React Native apps that optimizes your app's startup time. With RAM bundles, it is possible to load to memory only those modules that are needed for specific functionality, and only when needed.
This is useful for apps that have a large number of screens that may not ever be opened during a typical usage of the app. Generally, it is useful to apps that have large amounts of code that are not needed for a while after startup.
Using Inline Requires
Using inline requires delays the requiring of a module or file until the file is actually needed. A basic example would look like this:
VeryExpensive.js
import React, { Component } from 'react';
import { Text } from 'react-native';
// ... import some very expensive modules

// You may want to log at the file level to verify when this is happening
console.log('VeryExpensive component loaded');

export default class VeryExpensive extends Component {
  // lots and lots of code
  render() {
    return <Text>Very Expensive Component</Text>;
  }
}
Optimized.js
import React, { Component } from 'react';
import { TouchableOpacity, View, Text } from 'react-native';

let VeryExpensive = null;

export default class Optimized extends Component {
  state = { needsExpensive: false };

  didPress = () => {
    if (VeryExpensive == null) {
      VeryExpensive = require('./VeryExpensive').default;
    }

    this.setState(() => ({
      needsExpensive: true
    }));
  };

  render() {
    return (
      <View style={{ marginTop: 20 }}>
        <TouchableOpacity onPress={this.didPress}>
          <Text>Load</Text>
        </TouchableOpacity>
        {this.state.needsExpensive ? <VeryExpensive /> : null}
      </View>
    );
  }
}
Even without the RAM format, inline requires can lead to startup time improvements, because the code within VeryExpensive.js will only execute once it is required for the first time.
Conclusion
While creating mobile applications with React-Native, performance issues are almost always from the javascript side of the bridge, so we need to be more aware of how we write code in react, and follow best practices to avoid performance issues. Hopefully, these tips help us avoid some of those problems and make your apps faster, more performant and optimized.
Here are a few other best practices to use in React-Native:
Best Practices
- Using Hermes.
- Memoize expensive computations.
- Remove the
console.logs. - Use dedicated components for certain layouts(E.G, using flatlist for large lists).
- Cache images locally(only supported in iOS): react-native-fast-image is available on android and IOS .
- Schedule animations with
InteractionManagerandLayoutAnimation. - Use
React.PureComponentfor class components oruseMemoanduseCallbackfor functional components to minimize wasted re-renders.